First – You will need to setup your workspace
The center of every workspace begins with a sturdy table for stamping. Along with your table, you’ll need good lighting (natural & lamps) and a comfortable chair or stool so you can see “over” your project.

Second – Time to get your supplies
Supplies:
- A poly (kitchen) cutting board
- A piece of granite for a tooling surface
- A plastic or glass bowl of clean water
- Clean sponges
- A ballpoint pen or pencil
- Brown or butcher paper to protect your work surface when dying
Optional supplies when needed include:
- A straightedge or ruler
- Leathercraft cement
- Leather dyes, stains, applicators and leather finish
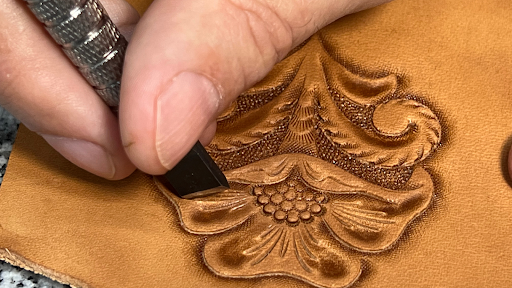
Third – Leathercraft Basic Tools
Find a mallet that comfortably fits your hand. For beginners, a wooden mallet is sufficient. For intermediate to advanced work, a poly or rawhide-head mallet is preferable. Once you become more advanced, many professionals like to use a maul.
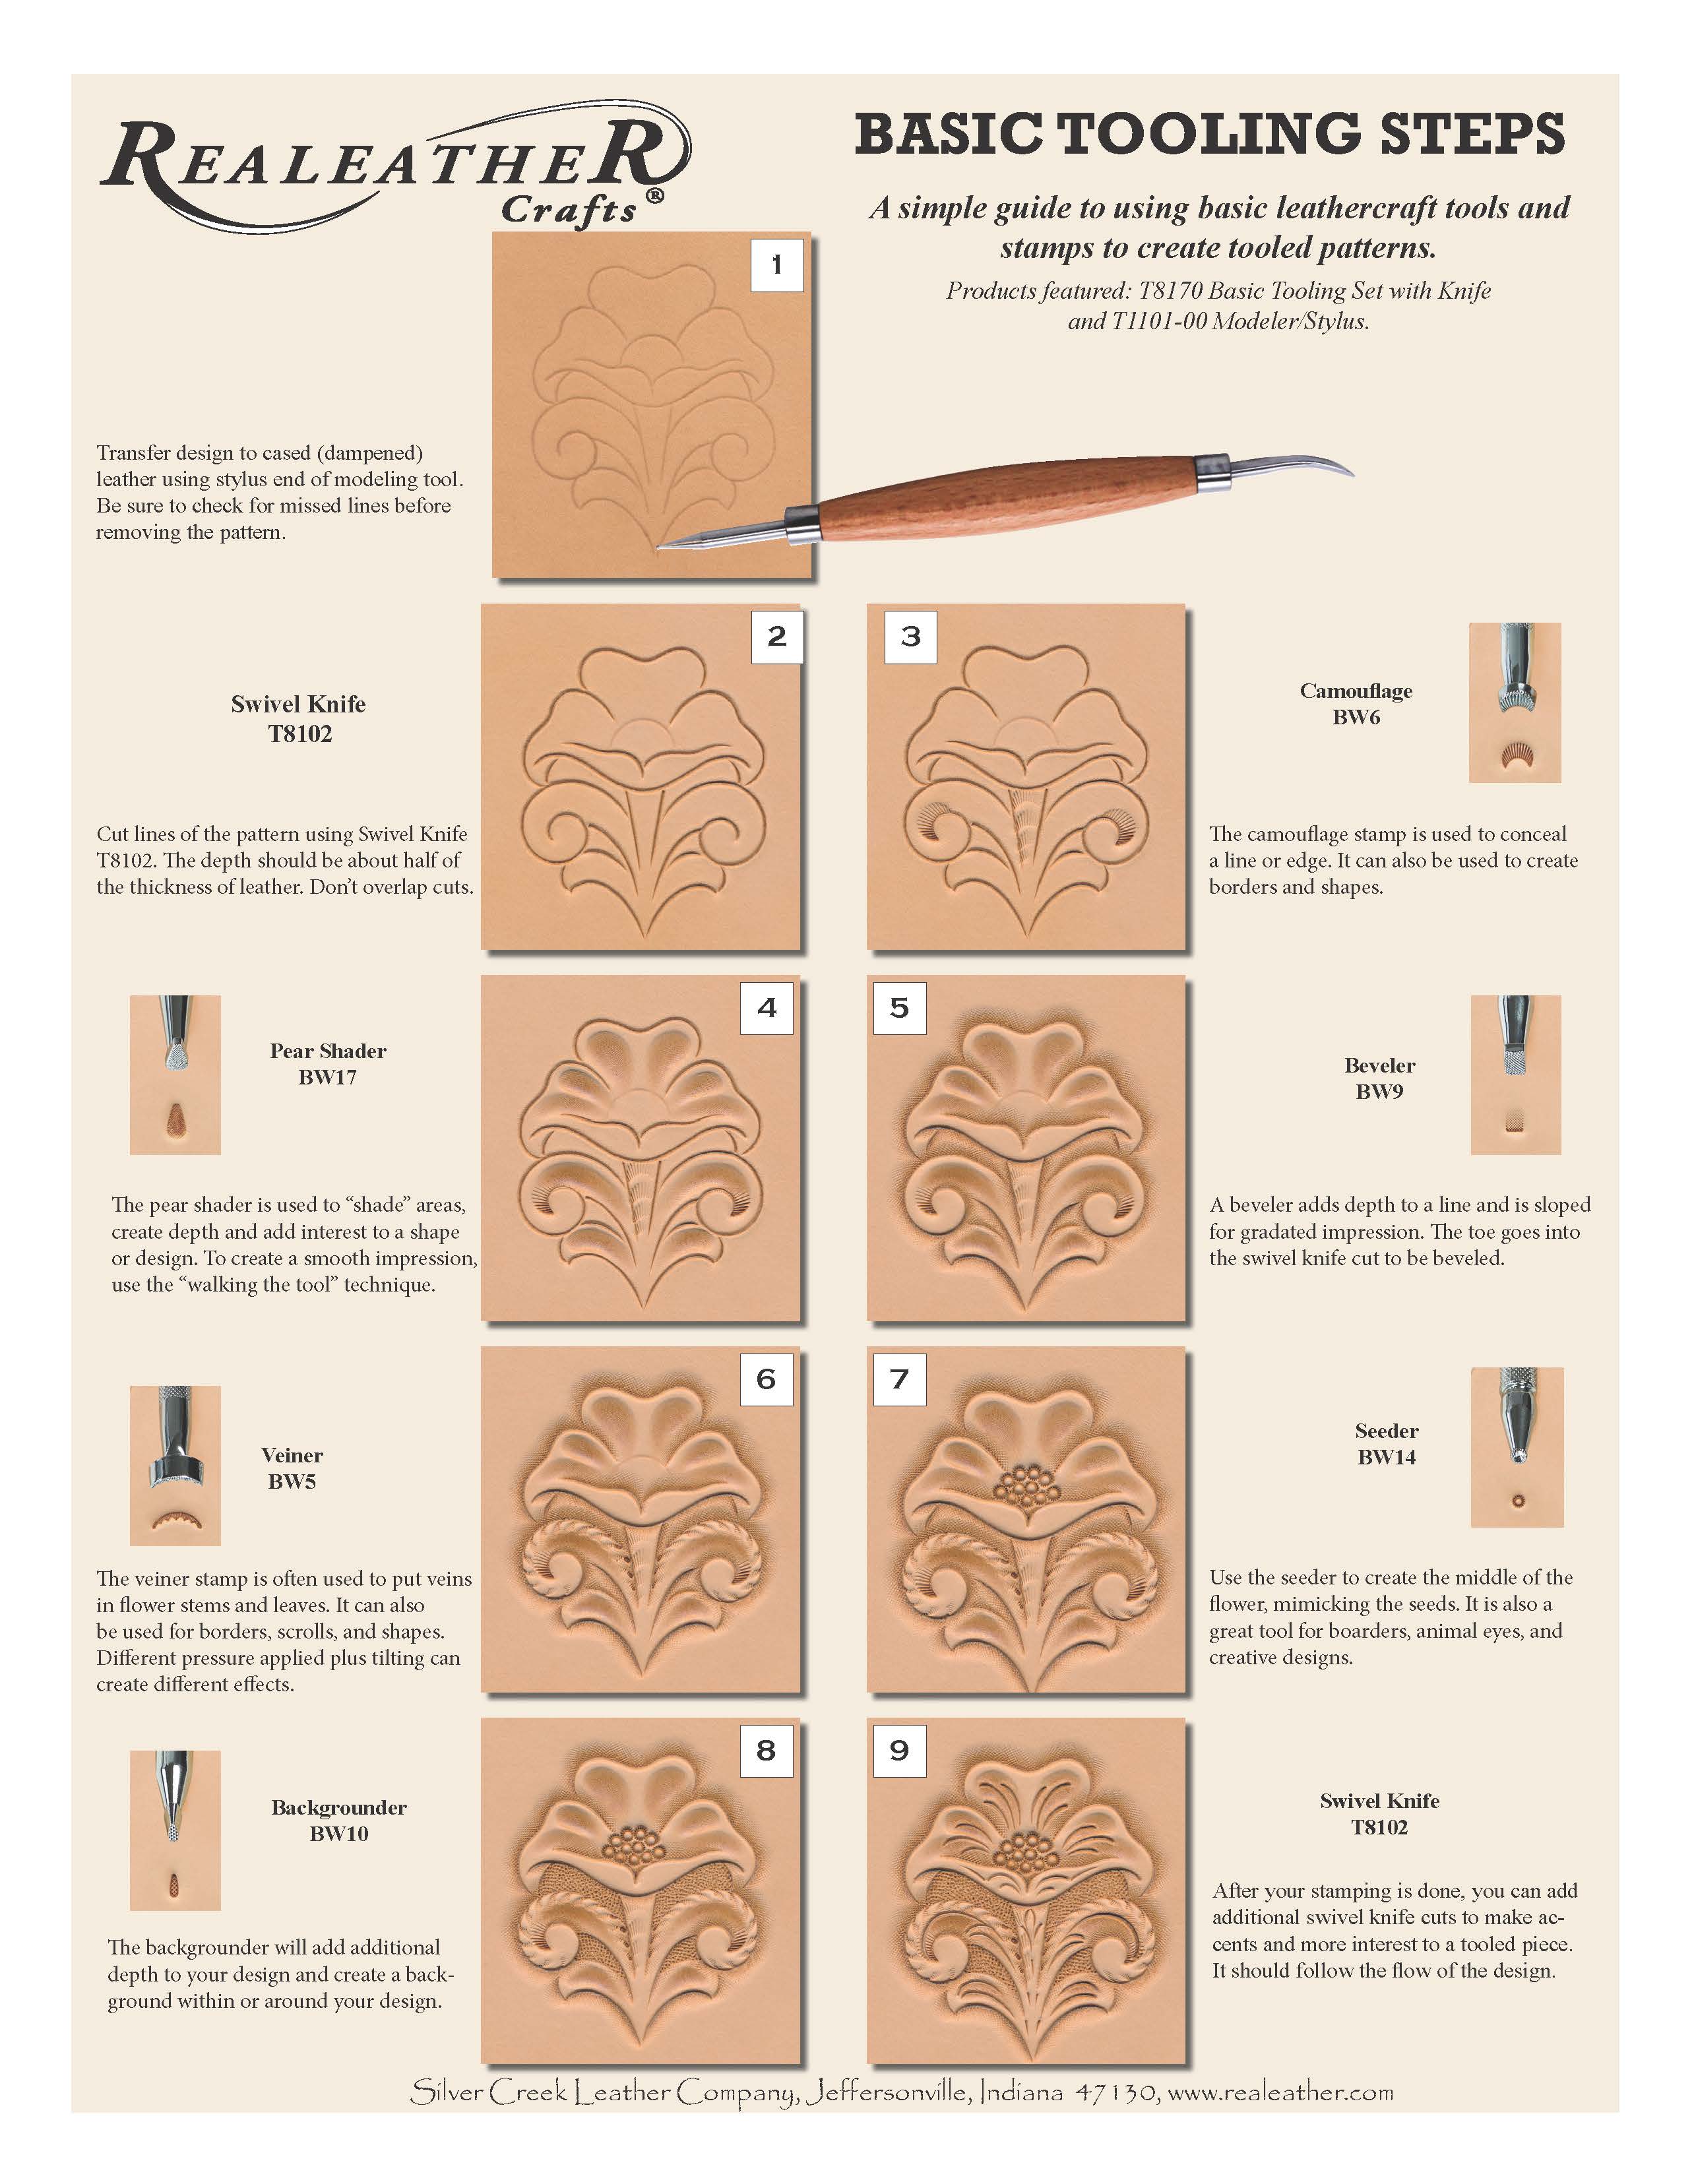
The Basic Tool Set #T8170 is the perfect introduction to leather tooling. This set includes a step-by-step instructional booklet, a swivel knife and blade, and 6 basic stamps used to create a variety of designs. Stamps include a camouflage, pear shader, beveler, veiner, seeder and backgrounder. These quality tools are designed to last a lifetime.
Other tools you may need:
- A modeling tool with a stylus on one end and a spoon on the other
- Tracing vellum for transferring patterns
- A craft knife and a pair of scissors for assembly
As you advance into working with leather, you will begin learning different techniques and finishing procedures that will require different tools to help you. Be sure your toolbox is large enough to assist you in your growth.